

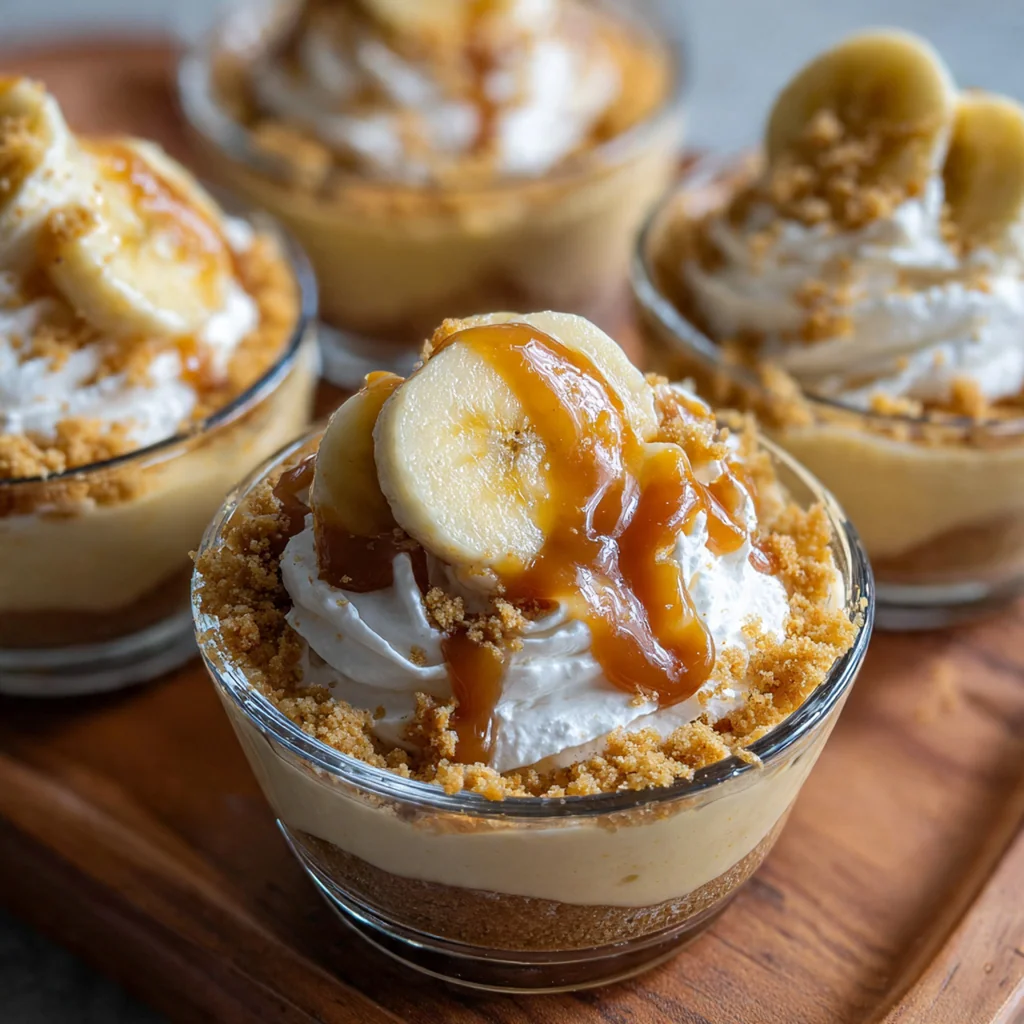
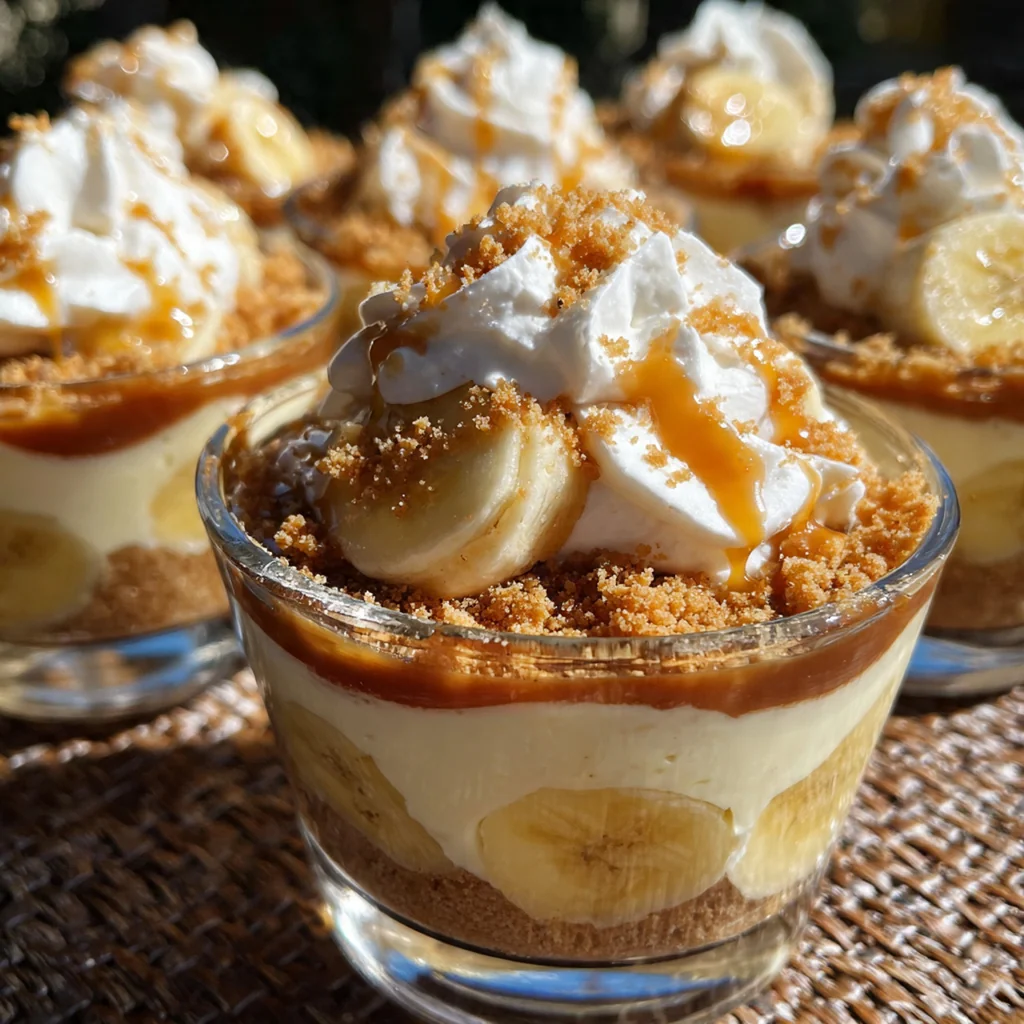
These Caramel Banana Pudding Cups are my favorite twist on the comforting Southern classic, transforming it into perfectly portioned individual desserts. I love how they balance creamy vanilla pudding with sweet bananas and that irresistible gooey caramel in every single layer. It’s an American treat that’s as perfect for a casual family dinner as it is for a fancy party spread. You’ll find they come together with surprisingly simple ingredients for a result that feels incredibly special every single time.
Why You'll Love This Recipe
- Individual servings make them a breeze to serve at any gathering
- The combo of banana, creamy pudding, and caramel is a guaranteed winner
- You can prep them ahead to save your sanity when company’s coming
- They’re incredibly easy to customize with different cookies or toppings
- My family requests these cups for every single potluck
Ingredients You’ll Need
- Crushed vanilla wafers: they create the classic, buttery base for our cups and add a wonderful texture contrast to the creamy layers. Look for a good quality brand for the best flavor.
- Unsalted butter, melted: this binds the wafer crumbs together to form a solid, delicious crust that holds up to the creamy filling. Using unsalted lets you control the salt level perfectly.
- Instant vanilla pudding mix: this is our shortcut to a consistently smooth and rich pudding layer every single time. Just make sure you get the cook-and-serve kind, not sugar-free, for the classic taste.
- Cold whole milk: the cold temperature is key for the instant pudding to set up properly and become thick and luscious. Whole milk gives you the creamiest possible texture.
- Heavy cream: when whipped, it adds incredible lightness and a cloud-like texture to the pudding mixture. Make sure it’s very cold so it whips up with maximum volume.
- Powdered sugar: it dissolves instantly into the cream as you whip, sweetening it gently without any graininess. A little goes a long way here.
- Vanilla extract: a dash of the real stuff deepens all the other flavors in the pudding and whipped cream. Pure vanilla extract makes a noticeable difference.
- Ripe bananas: they provide the essential fruity sweetness and soft texture. Choose bananas that are yellow with just a few spots for optimal flavor and structure.
- Caramel sauce: this is the star, adding that rich, gooey, buttery ribbon throughout the cups. A good quality store-bought sauce works wonderfully for ease.
- Whipped cream for topping: a light, fluffy finish that makes each cup look and taste extra special. You can use homemade or a quality canned version.
- Extra caramel sauce for drizzling: don’t be shy with that final drizzle for visual appeal and an extra burst of caramel flavor.
- Sea salt flakes for garnish: a tiny pinch on top creates a magical sweet-and-salty contrast that elevates the whole dessert.
- Additional crushed vanilla wafers for sprinkling: they add a final bit of crunch and a nod to the classic banana pudding presentation.
How to Make It
Mix and Press the Crust:
In a medium bowl, toss the crushed vanilla wafers with the melted butter until every crumb is coated. You’re looking for a texture like wet sand. Firmly press about two tablespoons of this mixture into the bottom of each of your six serving cups. Pop them in the fridge for ten minutes to set while you move on. This chilling step helps the crust stay distinct and not get soggy too fast.
Whisk the Pudding Base:
Grab a large bowl and whisk together the instant pudding mix and the two cups of cold milk. Keep whisking for a full two minutes until you see it thicken up nicely and become smooth. Then just set it aside for a moment. The cold milk is crucial here for the instant pudding to activate and set correctly.
Whip the Cream to Stiff Peaks:
In another bowl, use your electric mixer to beat the heavy cream, powdered sugar, and vanilla extract. Start on medium speed and then bump it up to medium-high. You’ll beat it for about three to four minutes, just until you see stiff peaks form. Be careful not to overbeat it, or you’ll start making butter.
Fold for a Fluffy Cream:
Now, gently fold that beautiful whipped cream into the pudding you set aside earlier. Use a spatula and a light hand, turning the mixture over from the bottom until no white streaks remain. You’ll end up with a light, fluffy, and perfectly combined filling that’s dreamy to work with.
Build the First Flavor Layers:
Take your cups from the fridge. Drizzle about a teaspoon of caramel sauce over each crust. Then, add a single layer of your banana slices, using roughly half of them. Spoon half of your fluffy pudding mixture evenly over the bananas in each cup. This creates your first set of distinct, delicious layers.
Repeat and Chill Thoroughly:
Here’s where you double down on flavor. Repeat the layering process: another drizzle of caramel, the rest of your banana slices, and then the remaining pudding mixture. Cover the cups loosely with plastic wrap and refrigerate them for at least two hours. This chill time is non-negotiable as it lets everything set up and the flavors really meld together.
Garnish Just Before Serving:
Right before you’re ready to serve, add the finishing touches. Top each cup with a dollop of whipped cream, a final artistic drizzle of caramel sauce, and if you’re feeling fancy, a tiny pinch of sea salt flakes. That little salt pop makes all the difference.
Serve and Enjoy:
Hand out the spoons and dig in. These Caramel Banana Pudding Cups are best enjoyed chilled, with every spoonful getting a bit of every layer. They’re a complete little dessert world in a glass.

You Must Know
- Use ripe but firm bananas so they hold their shape
- Chill the cups for the full two hours for perfect set
- Whip the cream until it holds a firm peak
- That sea salt sprinkle is a game-changer
- I never skip the extra caramel drizzle on top
Storage Tips
Store these caramel banana pudding cups covered tightly with plastic wrap in the refrigerator, and they’ll keep beautifully for up to two days. The bananas will naturally darken a bit after the first day, but I promise the flavor is still absolutely fantastic. I don’t recommend freezing them at all, as the texture of the pudding and bananas will become watery and unpleasant upon thawing. They’re truly a make-ahead dessert meant for enjoying within a short, sweet window.
Ingredient Substitutions
If you’re out of vanilla wafers, graham cracker crumbs or even crushed shortbread cookies make a wonderful buttery crust base. For a gluten-free version, just swap in your favorite gluten-free vanilla cookies. You can use any milk you have for the pudding, though the richness will vary, and for a dairy-free take, opt for full-fat coconut milk and a plant-based whipped topping. While homemade caramel is amazing, a quality store-bought sauce saves so much time and still delivers that gooey, sweet ribbon we all love.
Serving Suggestions
I love serving these caramel banana pudding cups after a big Southern-style meal with a hot cup of coffee or a glass of cold sweet tea. They also shine as part of a dessert buffet alongside some chewy chocolate chip cookies or a bowl of fresh, juicy berries for contrast. For a real treat, set up a little topping bar with extra sauces, toasted nuts, and different cookie crumbles so everyone can customize their own perfect cup.
Cultural Context
This recipe is a fun, individual spin on the iconic Southern banana pudding, a dessert that’s as much a part of the region’s culinary identity as pecan pie or biscuits. That classic version, often made in a big trifle bowl for church suppers and family reunions, layers vanilla pudding, vanilla wafers, and bananas, sometimes with a meringue topping. Our take nods to tradition with the wafers and bananas but introduces a luxurious caramel swirl, turning each serving into its own portable, party-ready celebration of those beloved flavors. It’s a testament to how home cooks love to play with and personalize the classics.
Pro Tips
- Warm your caramel sauce slightly for easier, more generous drizzling
- Make sure your heavy cream is ice-cold before whipping for best results
- Assemble no more than a day ahead to keep bananas looking fresh
- A microplane makes quick work of zesting if you add lemon
- I always make a little extra whipped cream for topping
Frequently Asked Questions
Absolutely! You can assemble these caramel banana pudding cups up to 4-6 hours ahead. To prevent the bananas from browning, ensure they are fully coated in caramel sauce and stored airtight in the fridge. Add the final whipped cream layer just before serving for the best texture.
For a lighter option, you can use full-fat coconut cream to whip for the topping. For the pudding itself, the whole milk is key for richness, but 2% milk can be used with a slight texture difference. Avoid skim milk as it will make the pudding too thin.
For instant pudding, it sets quickly. After whisking the mix with cold milk for the full 2 minutes, it should be thick and smooth. Letting the assembled cups chill for the full 2 hours ensures all the layers firm up perfectly for clean spoonfuls.
Use a thick, store-bought caramel sauce or homemade sauce for these caramel banana pudding cups. A thicker sauce helps create defined layers and prevents the dessert from becoming too runny. You can warm it slightly for easier drizzling.
These rich, individual desserts are fantastic on their own. For an American-style dessert spread, pair them with a light fruit salad or a plate of butter cookies. They’re also perfect with a cup of coffee to balance the sweetness.