

The ultimate Cheeseburger Lava Molten Cheese recipe transforms a simple dinner into a showstopping event. Imagine cutting into a perfectly cooked burger patty only to find a river of hot, creamy cheese spilling out. This brilliant twist on an American classic combines all the comforting flavors you crave with an element of pure surprise. It’s a fun, interactive meal that turns an ordinary cookout into something you and your guests will talk about for weeks.
Why You'll Love This Recipe
- The molten cheese center is a deliciously fun surprise with every single bite
- A crispy, seasoned crust gives way to a river of hot, gooey filling
- It’s surprisingly impressive for both weeknights and weekend cookouts
- You can totally customize the cheesy center with your own favorite add-ins
- My family goes absolutely wild for these, every single time
Ingredients You’ll Need
- Ground chuck (80/20 blend): This specific fat-to-lean ratio is non-negotiable for juicy, flavorful patties that hold together around the molten center without drying out. Look for bright, cherry-red meat.
- Kosher salt: Its coarse flakes season the meat more evenly than fine table salt and help develop that crave-worthy crust in the hot skillet.
- Freshly ground black pepper: Freshly cracked pepper has a brighter, more aromatic flavor that really shines through against the rich beef and cheese.
- Garlic powder: It provides a consistent, mellow garlic flavor that permeates the entire burger patty without the risk of burning like fresh garlic might.
- Onion powder: This gives you that savory, allium backbone essential to any great burger, distributed perfectly throughout the ground meat.
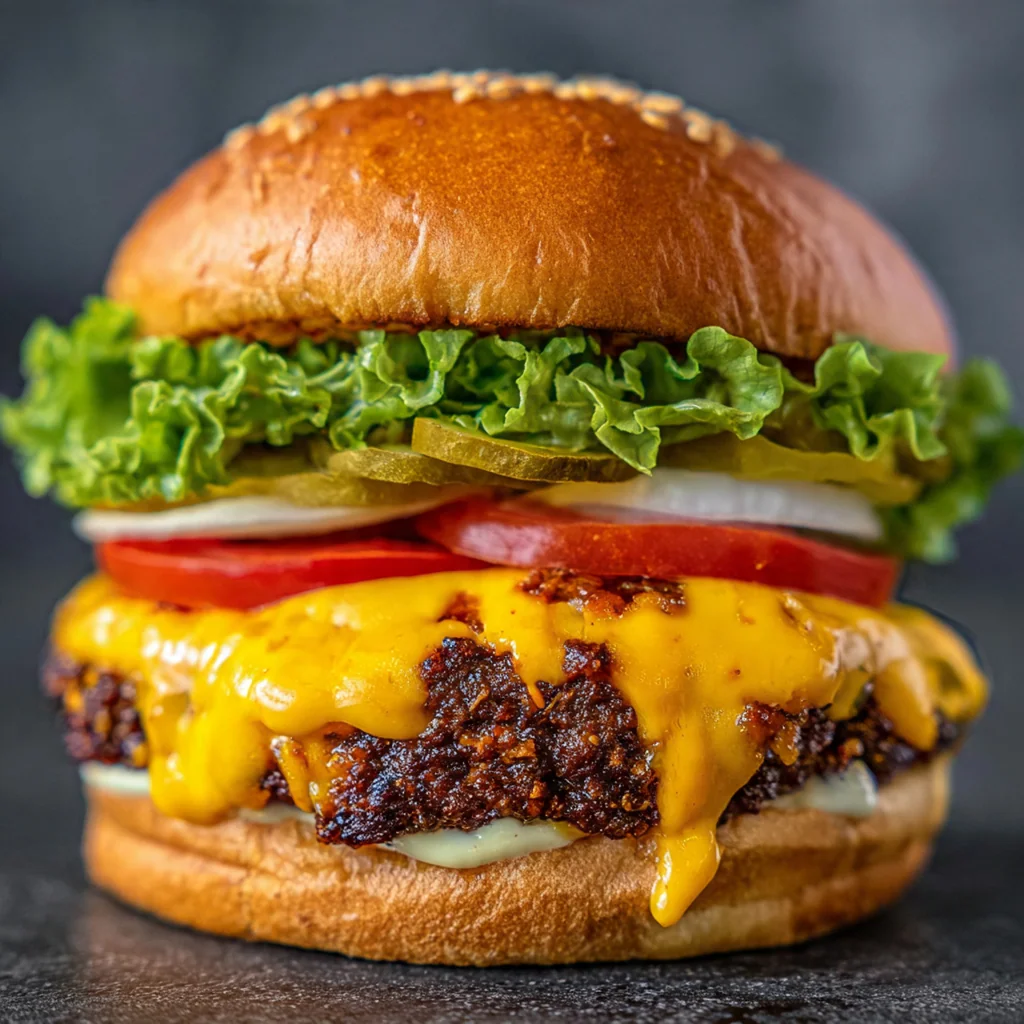
- Full-fat cream cheese: Softened cream cheese is the magic binder for the molten filling, creating a smooth, scoopable base that melts luxuriously.
- Shredded sharp cheddar cheese: The sharper the cheddar, the more pronounced the cheesy flavor that bursts out of the center. Pre-shredded bags can contain anti-caking agents.
- Finely chopped cooked bacon: It adds a smoky, salty crunch and incredible depth of flavor right into the molten cheese heart of the burger.
- Green onions: Their fresh, mild bite cuts through the richness and adds a pop of color and texture to the cheese mixture.
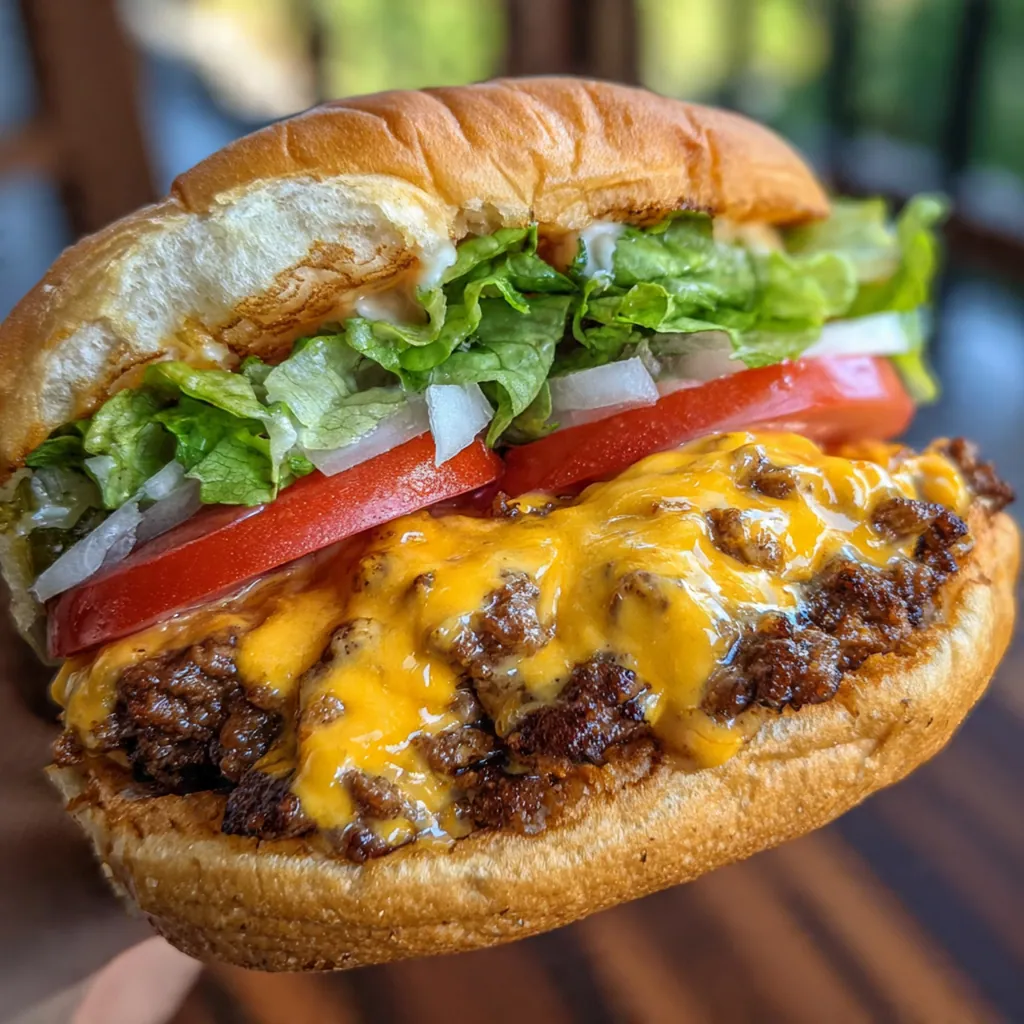
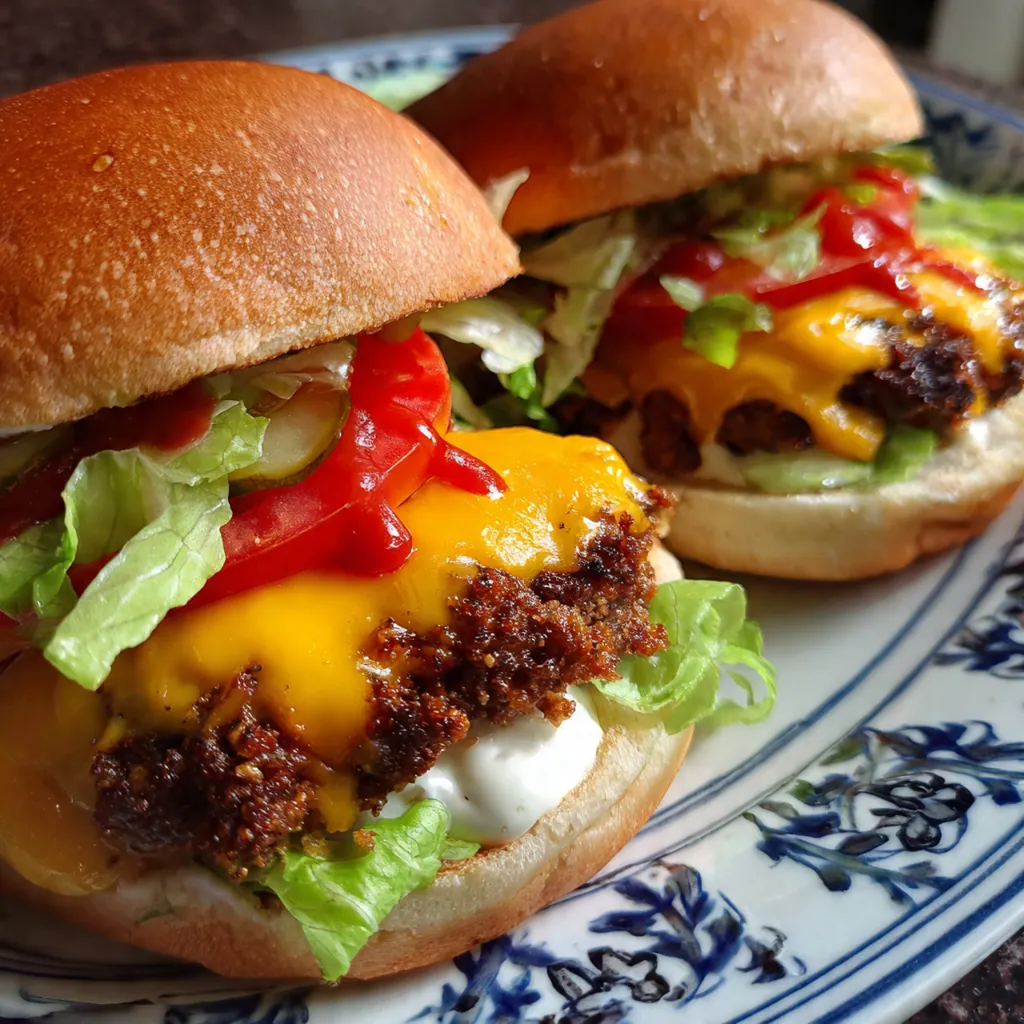
- Brioche hamburger buns: Their rich, buttery flavor and slightly sweet, pillowy texture are the perfect vessel for holding this decadent, juicy creation.
- Unsalted butter: Softened butter helps toast the buns to a perfect golden brown, adding another layer of flavor and preventing sogginess.
- Green leaf lettuce: A crisp, cool layer that provides fresh texture and keeps the bottom bun from getting soaked through by the burger’s juices.
- Large tomato: Thick, ripe slices add a necessary acidic, juicy component that balances the heavy richness of the meat and cheese.
- Red onion: Thinly sliced for a sharp, pungent bite that cuts through all the fat and creaminess in the most satisfying way.
- Dill pickle chips: Their bright, vinegary tang is the classic burger condiment you need to balance every savory, cheesy, beefy mouthful.
How to Make It
Craft The Molten Cheese Filling:
Grab a medium bowl and combine your softened cream cheese, shredded cheddar, chopped bacon, and sliced green onions. Mix it all with a fork until it’s completely uniform. This creamy, chunky mixture is the secret lava that will make your burgers unforgettable.
Form And Chill The Cheese Balls:
Scoop the cheese mixture into four equal portions, then roll each one into a tight, smooth ball with your hands. Place them on a parchment-lined plate and pop them in the freezer. That fifteen-minute chill is what keeps the cheese from melting too early and leaking out.
Season And Prepare The Beef:
In a large bowl, gently work the kosher salt, black pepper, garlic powder, and onion powder into the ground chuck. Use a light touch here, overmixing makes the meat tough. Divide the meat into four equal portions so each burger has a generous amount of beef to wrap around the cheese.
Assemble The Stuffed Burger Patties:
Take one portion of beef and flatten it into a thin, wide disc in your palm. Place a frozen cheese ball right in the center. Carefully wrap the beef up and around the cheese, pinching the seams to seal it completely. Gently flatten it into a thick patty, making sure no cheese is peeking through.
Chill The Patties And Toast The Buns:
Get your assembled patties onto a plate and into the fridge for ten minutes. This final chill firms everything up. Meanwhile, spread softened butter on your brioche buns and toast them in a skillet or under the broiler until they’re golden and fragrant.
Cook The Burgers To Perfection:
Heat a heavy skillet over medium-high heat until it’s seriously hot. Add your chilled patties and let them cook undisturbed for about four to five minutes per side. Don’t press down. You’re aiming for a deep brown crust and an internal temperature of 145°F for that perfect molten center.
Rest And Assemble The Masterpiece:
Let the cooked burgers rest on a cutting board for a few minutes. This lets the juices settle so they don’t all rush out at once. Build your burger with lettuce, the patty, tomato, red onion, and pickles on that toasted bun. Serve it immediately for the full, glorious lava effect.
You Must Know
- Chilling the cheese balls is the single most important step for success
- Never press down on the patties while they cook in the skillet
- Seal the beef around the cheese tightly, wetting your fingers helps
- Let the burgers rest for a few minutes before you take that first bite
- I learned the hard way that skipping the chill means a cheese explosion
Storage Tips
These Cheeseburger Lava Molten Cheese burgers are truly at their peak the moment they come off the skillet, but you can absolutely prep ahead to make dinner faster. You can form the cheese balls and even assemble the stuffed patties up to a full day in advance, just keep them covered in the fridge until you’re ready to cook. If you have any leftovers, store them in an airtight container in the fridge for up to two days. Reheat them gently in a skillet over low heat or in short bursts in the microwave, but know that magical molten center won’t be quite the same as the first time.
Ingredient Substitutions
If you can’t find ground chuck, another 80/20 ground beef blend will work just fine, though chuck has that classic burger flavor. For the cheese, you can swap the sharp cheddar for pepper jack for a spicy kick or even a good melty gouda. No brioche buns? Any soft, sturdy hamburger bun or even potato rolls will do the job. The bacon in the filling can be omitted for a simpler cheese center, or you could mix in a teaspoon of smoked paprika to mimic that smoky flavor. If you’re out of green onions, a tablespoon of very finely minced red onion will add a similar punch.
Serving Suggestions
You’ll want classic, crave-worthy sides that can stand up to this star of a main dish. A big basket of crispy, salted french fries or crispy baked sweet potato fries are my go-to for soaking up any runaway cheese. A simple, vinegary coleslaw or a crisp side salad with a sharp dressing helps cut through all the richness beautifully. For drinks, you can’t go wrong with an ice-cold lager or a thick, creamy chocolate or vanilla milkshake for the ultimate nostalgic meal experience.
Cultural Context
This recipe is a playful and decadent love letter to the all-American backyard cheeseburger, taking a page from the surprise-and-delight playbook of dishes like molten chocolate lava cake. It embodies the American spirit of innovation and indulgence in comfort food, turning a familiar favorite into an interactive, shareable event. While the classic cheeseburger is a staple of diners and barbecues across the country, the ‘lava’ twist speaks to our modern desire for meals that are both delicious and visually thrilling, perfect for social media but even better for the dinner table. It’s a reminder that sometimes, the best recipes are the ones that bring a little fun and wonder to a meal we all know and love.
Pro Tips
- Use an instant-read thermometer to nail the 145°F internal temp
- Wet your fingers slightly when sealing the patty to prevent cracks
- Make the optional special sauce for an extra flavor boost
- If cheese starts to seep, just scoop it onto the top of the burger
- Trust me, the resting period is worth the wait
Frequently Asked Questions
For the best molten center, use a combination of full-fat cream cheese and shredded sharp cheddar. The cream cheese creates a smooth, meltable base, while the sharp cheddar provides the classic, bold cheeseburger flavor that oozes perfectly.
You can prepare the stuffed burger patties up to a day in advance. Keep them covered in the fridge until ready to cook. Let them sit at room temperature for 15-20 minutes before cooking to ensure even cooking.
For a similar creamy, melty texture, you can substitute the cream cheese with an equal amount of mascarpone or a blend of shredded mozzarella and a tablespoon of mayonnaise. The goal is a cheese that melts smoothly without separating.
Cook the burgers over medium-high heat for about 4-5 minutes per side, or until the internal temperature of the meat (not the cheese center) reaches 160°F (71°C). The outside should be nicely seared, and you’ll see the cheese just starting to peek out at the seams.
Serve these juicy, cheesy burgers on toasted brioche buns with classic toppings like lettuce, tomato, and pickles. Pair them with crispy french fries, sweet potato fries, or a simple side salad for the perfect American-style comfort meal.