


This Cheesy Taco Shells Bake is my go-to for turning the chaos of taco night into a comforting, one-dish meal. It’s a Mexican-American family favorite that layers all your favorite taco fillings with crispy shells and bubbly cheese. I love how it brings everyone to the table with minimal fuss and maximum flavor. You get that cozy, baked-in goodness that makes weeknights feel a little more special.
Why You'll Love This Recipe
- Pantry-friendly ingredients make this a lifesaver on busy nights
- The layers bake into the perfect mix of crispy, cheesy, and savory
- You can customize every single bowl with your favorite fresh toppings
- Leftovers reheat beautifully for an easy lunch the next day
- It’s the dish my kids request every single time
Ingredients You’ll Need
- Olive oil: for sautéing the aromatics and building the base of your filling. A good extra virgin olive oil adds a touch of fruity depth.
- Yellow onion: diced and cooked until soft to add a sweet, savory foundation. Yellow onions have the perfect balance for this kind of hearty dish.
- Garlic: minced fresh for that unmistakable punch of flavor. It becomes fragrant quickly, so don’t let it burn.
- Ground beef: the main protein that gives the bake its classic taco heartiness. I prefer 85% lean for the best flavor without being too greasy.
- Taco seasoning mix: a convenient flavor bomb that delivers all the classic spices in one go. Check the label if you need it to be gluten-free.
- Salsa: adds moisture, a bit of tang, and a gentle kick. Using a medium heat gives you flavor without overwhelming spice.
- Black beans: drained and rinsed to add fiber and a creamy, earthy texture. They make the filling more substantial and satisfying.
- Corn kernels: a pop of sweet freshness that cuts through the richness. Frozen, fresh, or canned all work great here.
- Hard taco shells: broken into pieces to create that signature crispy layer. They soften just enough in the bake while keeping their structure.
- Cheddar cheese: shredded for that sharp, classic melt we all love. It creates the gooey, golden top we’re after.
- Monterey Jack cheese: a milder, creamy cheese that melts like a dream and blends beautifully with the cheddar.
- Sour cream: a cool, tangy topping that balances the heat and richness of the bake.
- Avocado: diced fresh for a creamy, buttery garnish that adds healthy fats.
- Fresh cilantro: chopped for a bright, herbal finish that makes the whole dish sing.
- Jalapeños: sliced thin for those who want an extra spicy kick on top.
How to Make It
Preheat and Prep Your Dish:
Start by heating your oven to 375°F and lightly greasing your 9×13 baking dish. This quick prep step ensures nothing sticks and your bake comes out cleanly every single time.
Sauté the Aromatics:
Heat the olive oil in your large skillet over medium heat, then add the diced onion. You’re looking for it to become soft and translucent, which usually takes about five minutes. Stir in the minced garlic right at the end so it becomes fragrant without burning.
Brown the Ground Beef:
Add the ground beef to the skillet with the onions and garlic. Use your wooden spoon to break it up into small crumbles as it cooks. Once it’s fully browned and no pink remains, carefully drain off any excess fat from the skillet.
Simmer the Savory Filling:
This is where the magic happens. Stir in the taco seasoning, salsa, black beans, and corn. Let everything come to a gentle simmer and cook for about five minutes, stirring once or twice. This melds the flavors and thickens the filling perfectly.
Build the Layers:
Now, grab your prepped baking dish. Spread half of the broken taco shells in an even layer on the bottom. Spoon half of your beef and bean mixture over the shells, then sprinkle with half of each cheese. Repeat the entire process with the remaining shells, filling, and cheeses.
Bake Until Golden and Bubbly:
Slide the dish into your preheated oven. Bake it for 20 to 25 minutes. You’ll know it’s done when the cheese is completely melted, bubbling, and the edges have turned a beautiful golden brown.
Let It Rest:
Pull the bake from the oven and let it sit on the counter for 5 to 10 minutes. This short rest is crucial because it allows the layers to set, making it much easier to slice and serve neatly.
Garnish and Serve:
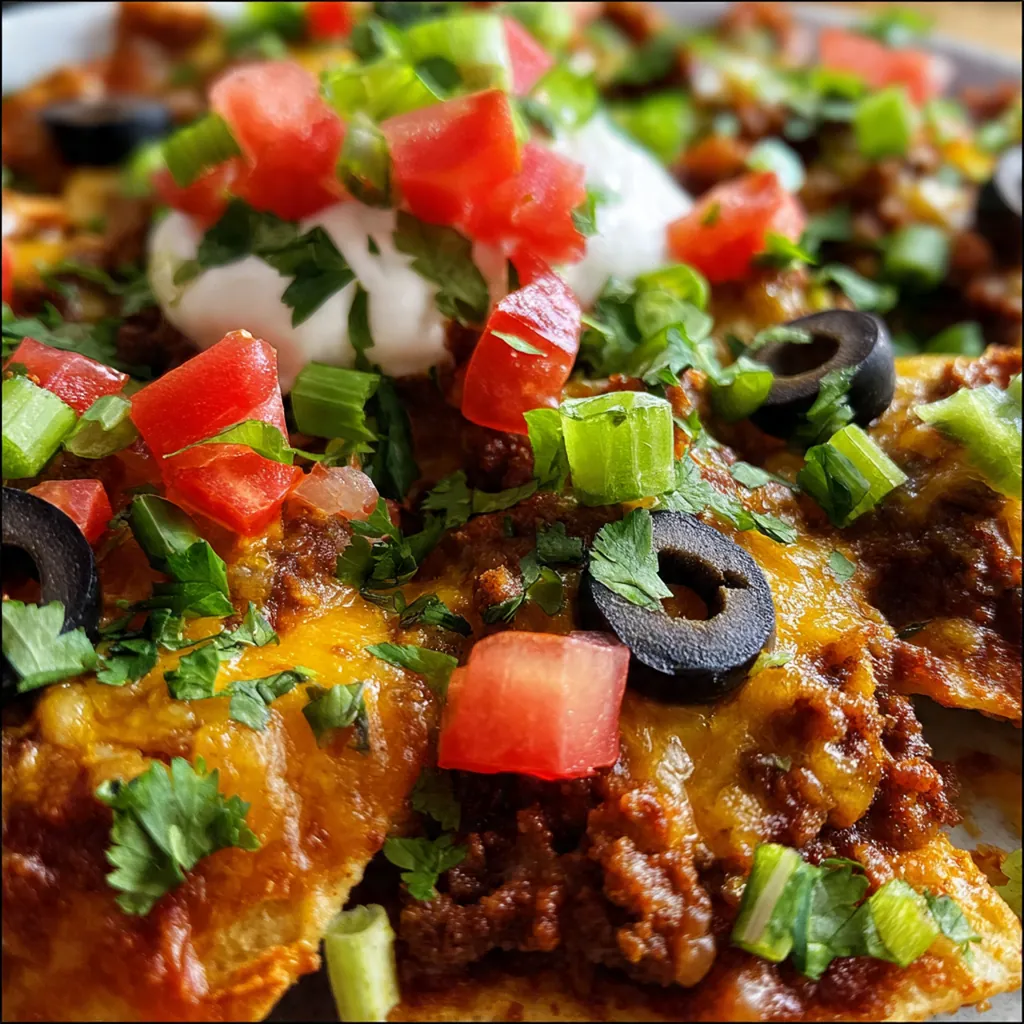
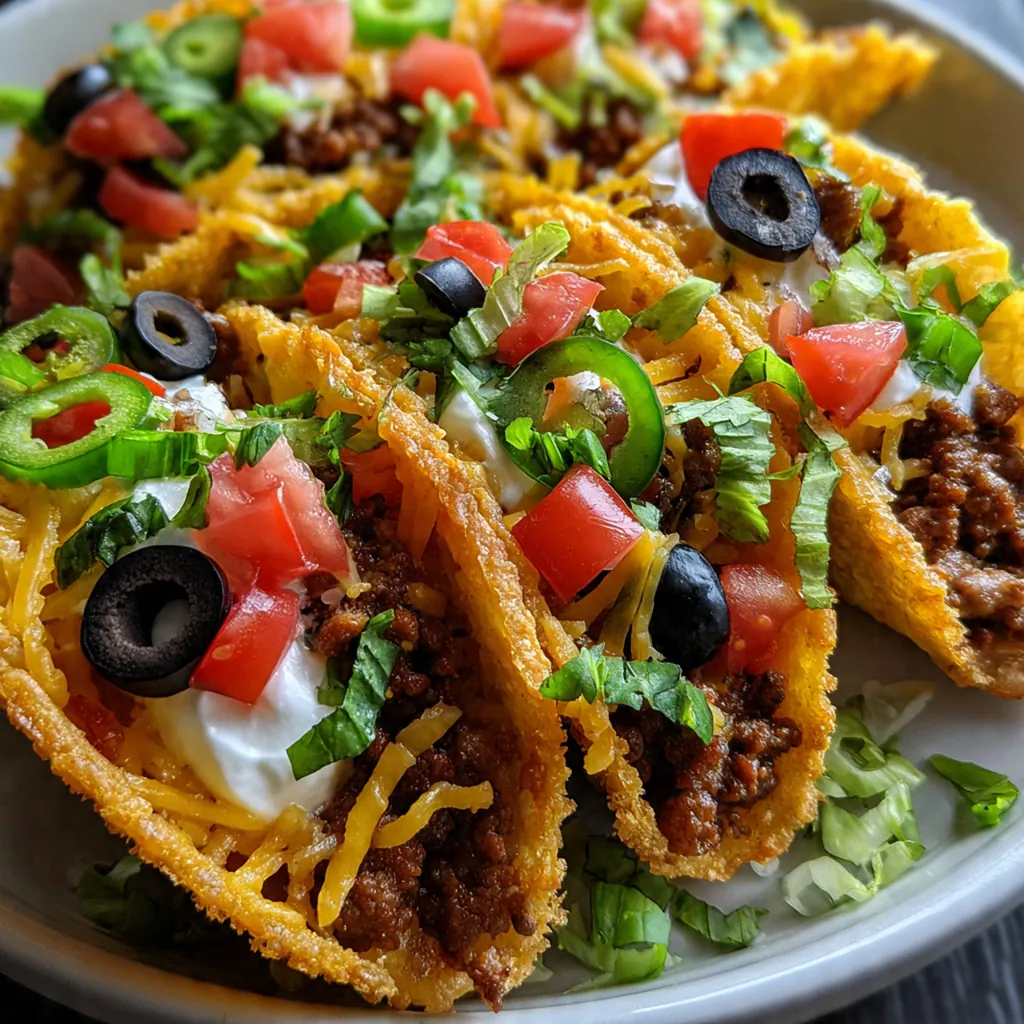
Finish your Cheesy Taco Shells Bake with any of the fresh toppings you love. I always go for a dollop of sour cream, some diced avocado, a sprinkle of cilantro, and a few jalapeño slices for heat.
You Must Know
- The broken taco shells create the base layer and add fantastic texture
- Letting the bake rest for a few minutes is non-negotiable for clean slices
- Customize the heat level by choosing mild or hot salsa and seasoning
- The optional fresh toppings truly elevate it from a casserole to a feast
- I never skip the fresh avocado on top
Storage Tips
Store any leftovers in an airtight container in the fridge, where they’ll stay good for up to three days. When you’re ready to eat, reheat individual portions in the microwave until warmed through, or for the best texture, pop it back in a 350°F oven for about 10 to 15 minutes. You can also freeze the assembled but unbaked casserole; just wrap it tightly and freeze for up to a month, then thaw it overnight in the fridge before baking as directed.
Ingredient Substitutions
If you don’t have ground beef, try ground turkey, chicken, or a plant-based crumble for a different twist. Swap the black beans for pinto or kidney beans, and use pepper jack instead of Monterey Jack if you want more spice. For the taco shells, corn-based ones are naturally gluten-free, and if you only have soft flour tortillas, just tear them into pieces and give them a quick toast in a dry pan before layering to prevent sogginess.
Serving Suggestions
I love serving this bake with a simple side of Mexican rice or warm refried beans to soak up all the cheesy goodness. A crisp green salad with a lime vinaigrette cuts through the richness perfectly. Don’t forget to set out small bowls of extra salsa, guacamole, and lime wedges so everyone can build their perfect plate.
Cultural Context
This Cheesy Taco Shells Bake is a classic example of Tex-Mex or Mexican-American home cooking, where convenience and big, comforting flavors come together. It takes the familiar elements of a taco—the seasoned meat, the beans, the crunchy shell—and transforms them into a shareable casserole, a format beloved for potlucks and family dinners across the United States. It’s a testament to how adaptable and welcoming this cuisine is, always encouraging you to make it your own with whatever toppings you have on hand.
Pro Tips
- For extra crunchy shells, toast the broken pieces on a sheet pan for five minutes before lay…
- Let the baked dish rest for a full ten minutes so the cheese sets and doesn’t run everywhere
- Use a mix of sharp cheddar and pepper jack for a more complex, spicy cheese pull
- If using soft tortillas, a quick toast in a dry skillet is your best defense against sogginess
- I always grate my cheese from a block for the creamiest melt
Frequently Asked Questions
For the best balance of flavor and moisture, we recommend 85% lean ground beef. It has enough fat to keep the filling juicy without making the casserole greasy. You can also use leaner beef or substitute ground turkey if preferred.
Yes, you can assemble the casserole up to a day in advance. Cover and refrigerate, then bake as directed, adding a few extra minutes if needed. Leftovers also reheat well in the oven or microwave for a quick meal.
If you don’t have black beans, pinto beans or kidney beans are excellent substitutes. You can also use refried beans for a creamier texture. Just be sure to drain and rinse canned beans to remove excess sodium.
The casserole is done when the cheese is fully melted and bubbly, and the edges are lightly browned. This usually takes about 25-30 minutes in a 375°F oven. Let it cool for 5-10 minutes before serving so the layers set.
This casserole is a complete meal on its own, but you can serve it with fresh toppings like chopped lettuce, diced tomatoes, sour cream, and avocado. A side of Mexican rice or a simple green salad also pairs well.