


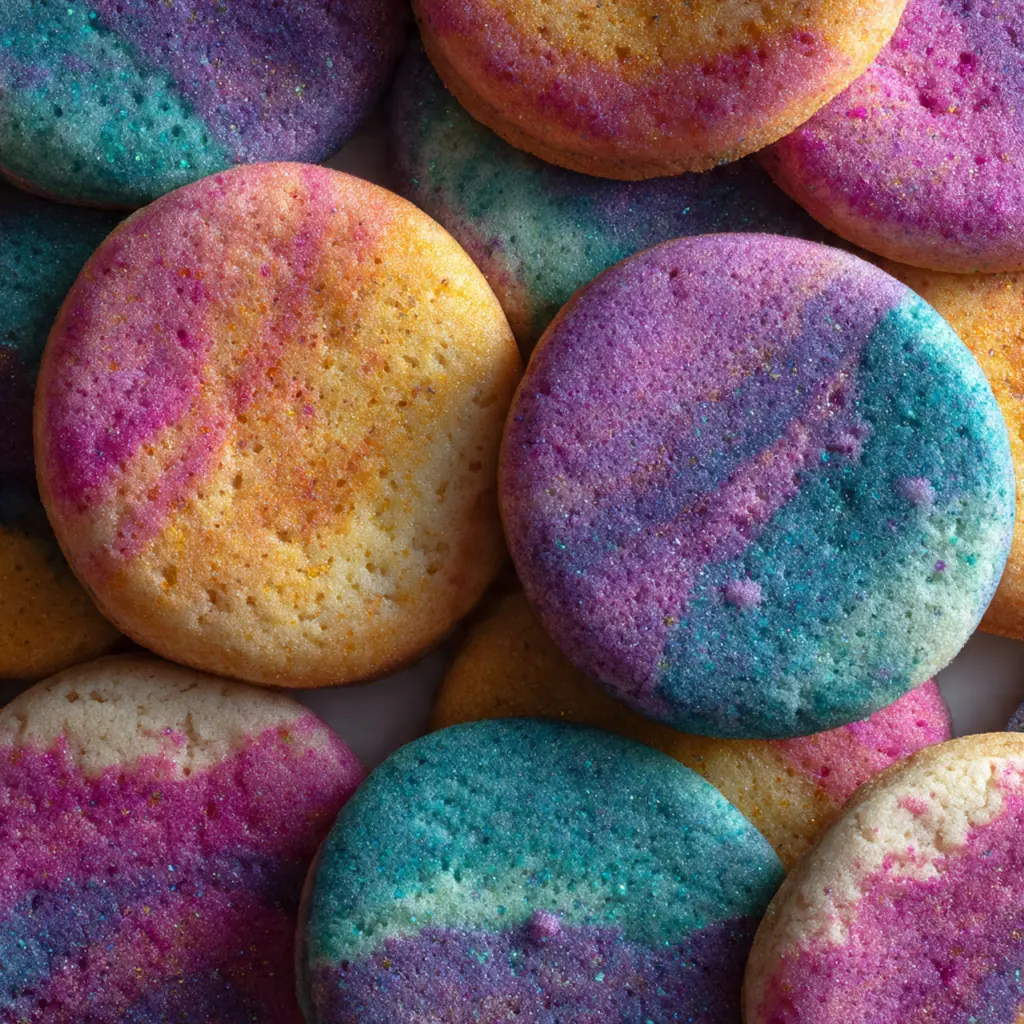
Swirled Tie Dye Sugar Cookies bring psychedelic fun to your baking tray with vibrant, hypnotic swirls in every bite. This creative twist on classic American sugar cookies uses a simple marbling technique to create stunning edible art. Perfect for birthday parties, Pride celebrations, or just brightening up a rainy afternoon, these cookies prove that sometimes the best treats are also the most visually exciting. Kids love helping with the dough coloring, and the results are always a conversation starter.
Why You'll Love This Recipe
- Visually stunning cookies that impress everyone without requiring professional pastry skills
- Surprisingly easy to make with just a basic sugar cookie dough you probably already know
- Customizable with any colors you like, so you can match any theme or mood
- Kids love helping with the marbling process, making it a perfect family baking activity
- Perfect for parties, bake sales, or just brightening up a rainy day
Ingredients You’ll Need
- All-purpose flour: The structure builder that holds everything together. Choose unbleached for a slightly heartier texture that supports the marbling beautifully
- Baking powder: The leavening agent that gives cookies just enough lift to stay tender without spreading into flat puddles
- Salt: Balances the sweetness and enhances every flavor note. Fine sea salt dissolves completely for even distribution
- Unsalted butter: Softened to room temperature for easy creaming. This controls salt levels and creates that melt-in-your-mouth tenderness
- Granulated sugar: Sweetens the dough and helps with browning. Standard supermarket sugar works perfectly for this recipe
- Large egg: Binds ingredients together and adds richness. Use room temperature eggs for smoother incorporation
- Pure vanilla extract: The warm, aromatic backbone of sugar cookies. Real vanilla makes a noticeable difference in flavor
- Pink gel food coloring: Creates vibrant magenta swirls without thinning your dough. Gel colors are concentrated for bold results
- Blue gel food coloring: Delivers electric blue hues that stay bright after baking. Just a few drops go a long way
- Yellow gel food coloring: Brings sunshine brightness to your marbled patterns. Mixes beautifully with other colors for custom shades
- Purple gel food coloring: Adds rich, royal depth to the tie dye swirls. Perfect for creating contrast against lighter colors
- Rainbow sprinkles: Optional but recommended for extra crunch and festive color that complements the marbled dough
- White sparkling sugar: Optional topping that adds sparkle and texture, making cookies look even more special
- Extra sprinkles for topping: Because more color is always better. Add before or after baking for different effects
How to Make It
Preheat and Prepare:
Start by preheating your oven to 350°F (175°C) and line two baking sheets with parchment paper. This ensures your tie dye sugar cookies bake evenly and release cleanly without sticking to the pan.:
Mix Dry Ingredients:
In a medium bowl, whisk together the flour, baking powder, and salt until well combined. Set this aside so it’s ready when you need it during the creaming stage.:
Cream Butter and Sugar:
Using a hand mixer or stand mixer, beat the softened butter and granulated sugar on medium-high speed for 2-3 minutes until light and fluffy. This incorporates air for a tender texture and is the foundation of your cookie dough.:
Add Wet Ingredients:
Add the egg and vanilla extract to the butter mixture, beating until fully combined for about 1 minute. Scrape down the sides of the bowl as needed so everything incorporates evenly.:
Combine Mixtures:
Gradually add the dry ingredients to the wet ingredients, mixing on low speed just until the dough comes together. Avoid overmixing since this can make cookies tough instead of tender.:
Create Color Sections:
Divide the dough evenly into 4 separate bowls, about 1 cup of dough per bowl. Add a few drops of each gel food coloring—pink, blue, yellow, and purple—to each bowl and stir until the color is vibrant and evenly distributed.:
Form Marbled Balls:
Take about 1 tablespoon of dough from each colored bowl and gently press them together into a ball. Roll the ball in your hands to smooth it out, leaving distinct color sections rather than blending them completely.:
Add Extras and Shape:
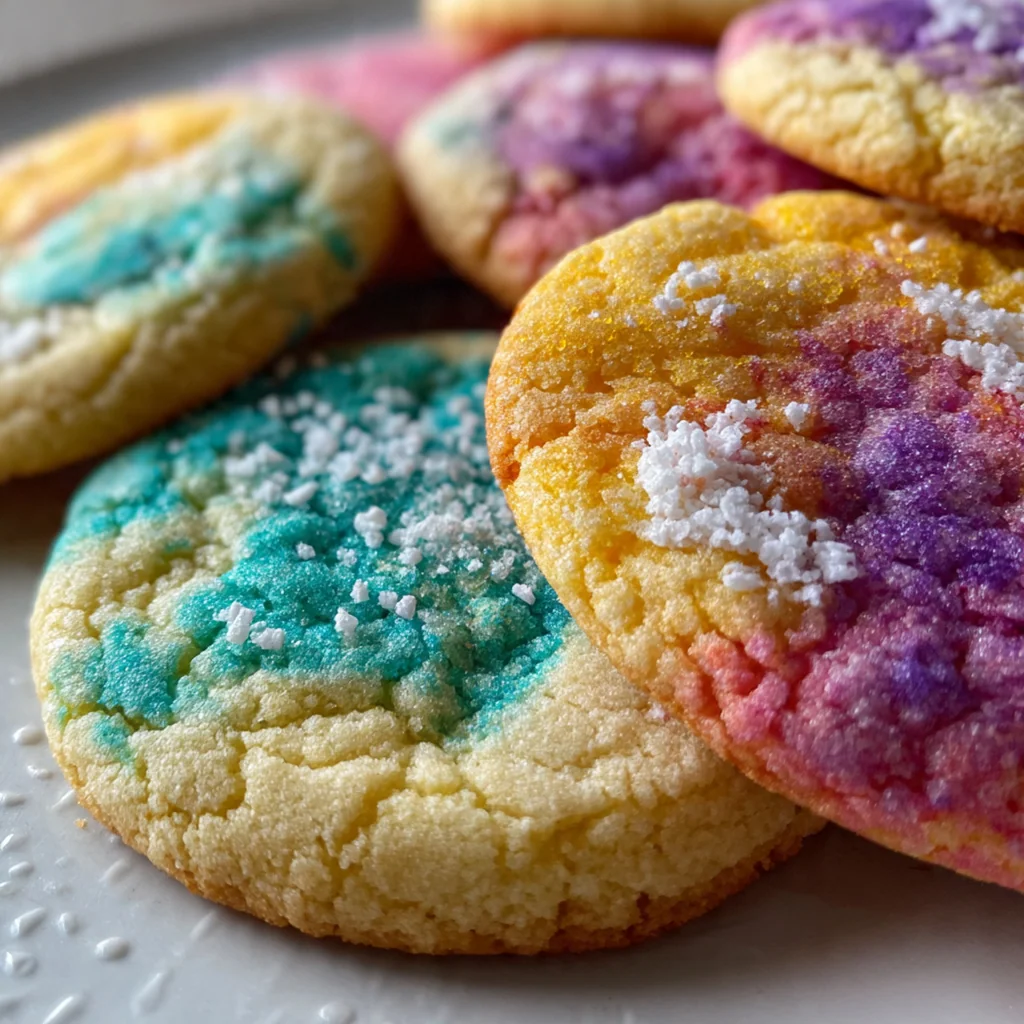
If desired, roll the dough ball in rainbow sprinkles for extra crunch and color. Place the dough balls onto the prepared baking sheets, leaving 2 inches of space between each cookie. Gently flatten each ball slightly with your palm or the bottom of a glass.:
Bake to Perfection:
Bake for 9-11 minutes, or until the edges are set but the centers still look slightly soft. The cookies will not have spread much, which preserves the marbled pattern. Let them cool on the baking sheet for 5 minutes before transferring to a wire rack.:
You Must Know
- Use gel food coloring instead of liquid to avoid thinning your dough
- Keep colors distinct by not over-blending when forming the marbled balls
- Chill the dough if it gets too warm while mixing to maintain structure
- Edges should be set but centers slightly soft when removing from oven
- Colors become more vibrant after cooling, so don’t overbake waiting for brightness
Storage Tips
Store the cooled cookies in an airtight container at room temperature for up to 5 days, layering them between sheets of parchment paper to prevent sticking and keep colors bright. The dough can be made ahead and refrigerated for up to 3 days, or frozen for up to 3 months—just thaw overnight in the fridge before rolling and baking. I like to keep a batch on the counter during parties since they’re such a conversation starter, but they stay freshest when sealed properly away from humidity.
Ingredient Substitutions
For gluten-free cookies, use a 1:1 gluten-free baking flour substitute in place of all-purpose flour. If you want dairy-free cookies, swap the unsalted butter for a plant-based butter stick designed for baking. For egg-free, try a flax egg (1 tablespoon ground flaxseed mixed with 3 tablespoons water, let sit 5 minutes) though texture may be slightly different. If gel food coloring isn’t available, liquid colors work but add them very sparingly to avoid altering the dough consistency.
Serving Suggestions
Serve these vibrant cookies with a cold glass of milk or a scoop of vanilla ice cream for that classic sugar cookie pairing. They make a beautiful addition to birthday party platters or cookie gift boxes, especially when stacked to show off the marbled swirls. I love pairing them with coffee for an afternoon treat since the colors brighten my mood immediately. For Pride celebrations or themed parties, coordinate the colors with your decor for a cohesive look.
Cultural Context
Sugar cookies have been a beloved American tradition for over three centuries, with Pennsylvania German settlers creating the first versions in the 1700s. The tie dye technique adds a modern, playful twist inspired by 1960s counter-culture aesthetics, bringing psychedelic flair to this classic cookie. While traditional sugar cookies focus on simple vanilla flavor and cut-out shapes, these marbled versions celebrate creativity and individual expression. The technique mirrors the joy of watching colors blend in unexpected ways, much like how tie dye clothing became a symbol of artistic freedom and community celebration.
Pro Tips
- Gel food coloring delivers vibrant hues without thinning your dough like liquid colors do
- Don’t overmix after adding colors to keep the marbling distinct and visually striking
- If dough gets too warm while mixing, chill it for 10 minutes before rolling to maintain stru…
- For sharper color contrast, resist the urge to blend colors completely together
- The cookies are done when edges are set but centers look slightly underbaked for that perfec…
Frequently Asked Questions
After chilling, divide the dough and color each portion with gel food coloring. Roll the colored portions into small snakes, alternate them in a straight line, then gently press them together and roll into a log. Chill the log before slicing to keep the swirls defined and prevent bleeding during baking.
Absolutely! The dough logs can be made, wrapped tightly in plastic, and refrigerated for up to 3 days or frozen for 3 months. You can slice and bake straight from the freezer (adding 1-2 extra minutes to the bake time).
Gel coloring is best because it’s concentrated and doesn’t add extra liquid to the dough. While you can use liquid food coloring, the colors will be more muted and may spread. Powdered food coloring also works well if you dust it on the dough layers.
Watch for lightly golden edges after 8-10 minutes of baking. The centers should look set but not wet. Let them rest on the hot baking sheet for 5 minutes before transferring to a wire rack to cool completely.
These colorful American cookies are perfect on their own with milk or coffee. For celebrations, pair them with a simple vanilla buttercream frosting, or serve them as part of a vibrant dessert platter with other rainbow treats.