

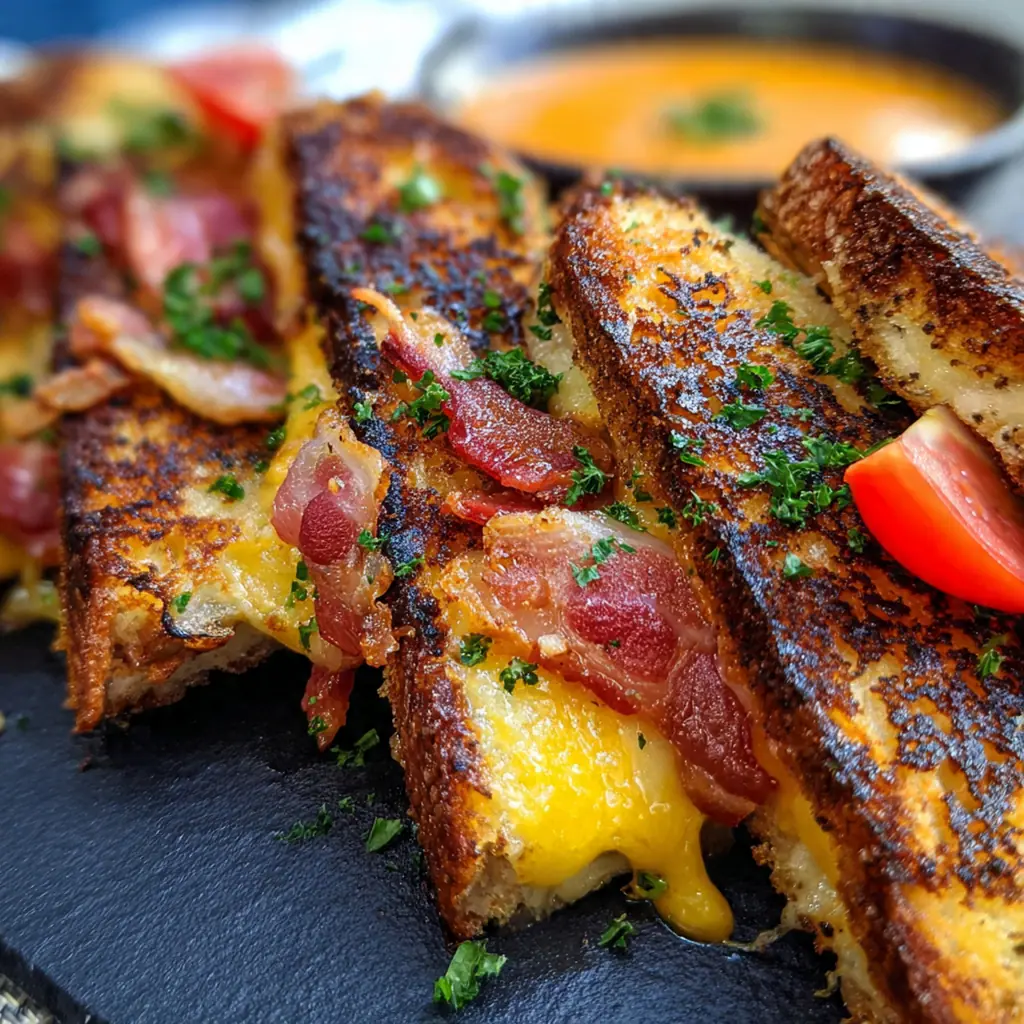
These Bacon Grilled Cheese Fingers are the ultimate upgrade to the classic sandwich, turning comfort food into a shareable, dippable snack. It’s a clever American twist that packs crispy bacon and melty cheese into every finger-friendly bite. You’ll find they’re perfect for parties, game days, or a cozy weeknight soup companion. I love how something so simple can be so completely addictive and satisfying for everyone.
Why You'll Love This Recipe
- Crispy bacon and gooey melted cheese in every single bite
- They’re the perfect party snack for feeding a hungry crowd
- You probably have most of these ingredients in your kitchen already
- Kids go crazy for them and adults can’t stop eating them either
- Honestly, they’re my go-to for any gathering
Ingredients You’ll Need
- Thick-cut bacon: Cook it until it’s super crispy so it stays crunchy inside the sandwich and doesn’t turn the bread soggy.
- Sourdough bread: It offers a nice tangy flavor and sturdy structure that holds up to the fillings without getting mushy.
- Shredded sharp cheddar cheese: This gives you that classic grilled cheese flavor with a good, bold kick that stands up to the bacon.
- Shredded mozzarella cheese: It melts into that wonderfully stretchy, creamy texture we all love in a grilled cheese.
- Grated Parmesan cheese: Adds a salty, savory umami punch that deepens the overall cheesy flavor profile.
- Unsalted butter: Softened butter spreads easily and gives the bread that gorgeous, golden, crispy exterior when cooked.
- Mayonnaise: Mixing it with the butter creates an unbeatable spread that makes the bread toast up extra crisp and flavorful.
- Garlic powder: It infuses the entire cheese mixture with a warm, savory note without any chopping required.
- Onion powder: This works with the garlic to build a delicious savory backbone for your cheese blend.
- Smoked paprika: Just a touch adds a subtle smokiness that complements the bacon beautifully.
- Black pepper: A little fresh crack adds a bit of heat and balances the richness.
- Fresh chives: The bright, mild onion flavor of chopped chives makes the perfect fresh garnish.
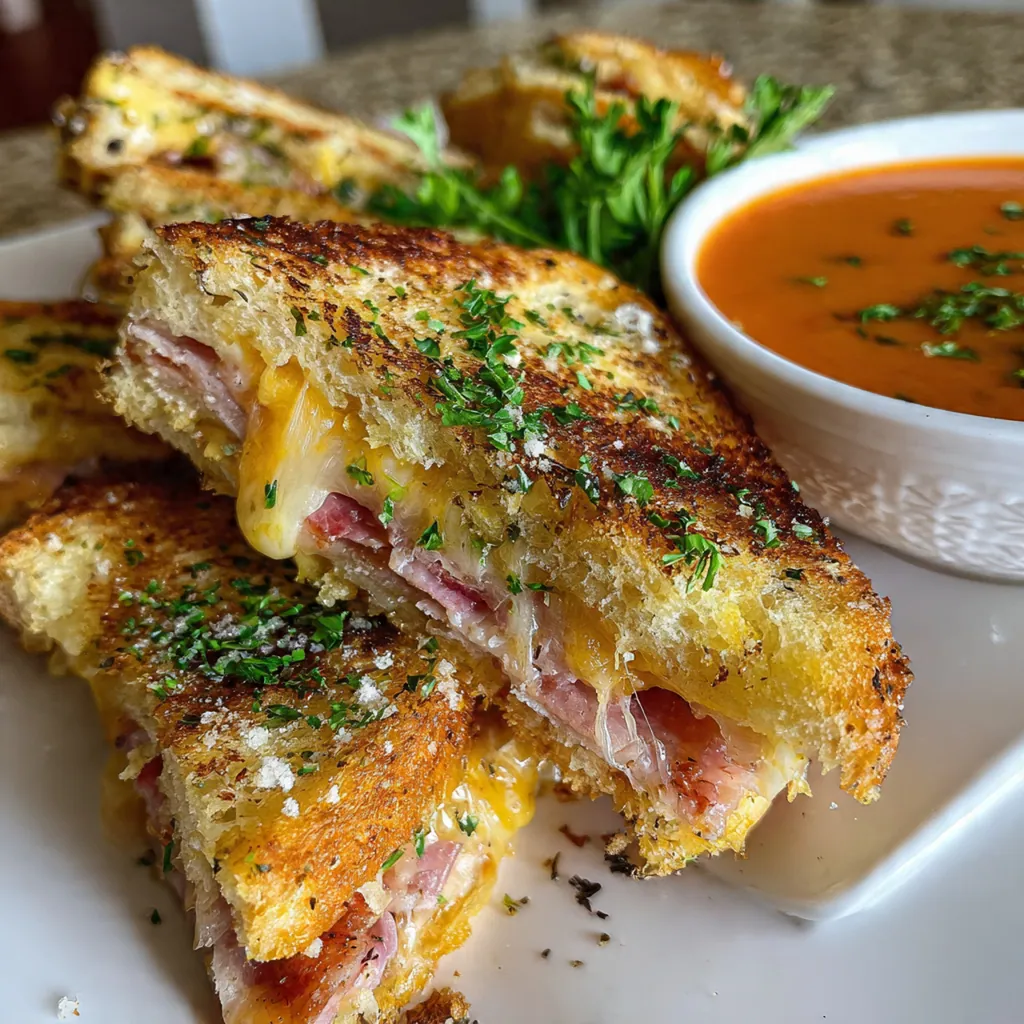
- Marinara sauce: A warm, tangy tomato dip is the classic partner that cuts through all the cheesy richness.
How to Make It
Cook the Bacon Until Crispy:
Start by cooking your bacon in a large skillet over medium heat. You want it nice and crispy, which takes about eight to ten minutes. Transfer it to a paper towel-lined plate to drain all that excess grease, then give it a rough chop into small pieces.
Prepare the Bread Fingers:
While the bacon cooks, take your sourdough slices and slice off the crusts. Then cut each slice vertically into three even strips, about one inch wide. These are your future Bacon Grilled Cheese Fingers, so try to keep them uniform.
Mix the Cheesy Bacon Filling:
In a medium bowl, combine all your shredded cheeses, the chopped bacon, and the seasonings. Use a fork to mix everything together really well so every scoop gets a bit of bacon and all the flavors.
Make the Toasting Spread:
In a small bowl, stir together the softened butter and mayonnaise until you have a completely smooth, spreadable mixture. This combo is the secret to getting that perfectly golden, crispy exterior on your bread.
Assemble the Sandwiches:
Lay your bread fingers out on a clean surface. Spread a thin layer of the butter-mayo mixture on one side of each finger. For each sandwich, take two fingers with the buttered sides facing out and place a generous tablespoon of filling in between.
Cook to Golden Perfection:
Heat your skillet or griddle over medium-low heat. Place your assembled sandwiches in the pan and cook for about three to four minutes per side. Press down lightly with your spatula to ensure even contact and browning.
Finish and Garnish:
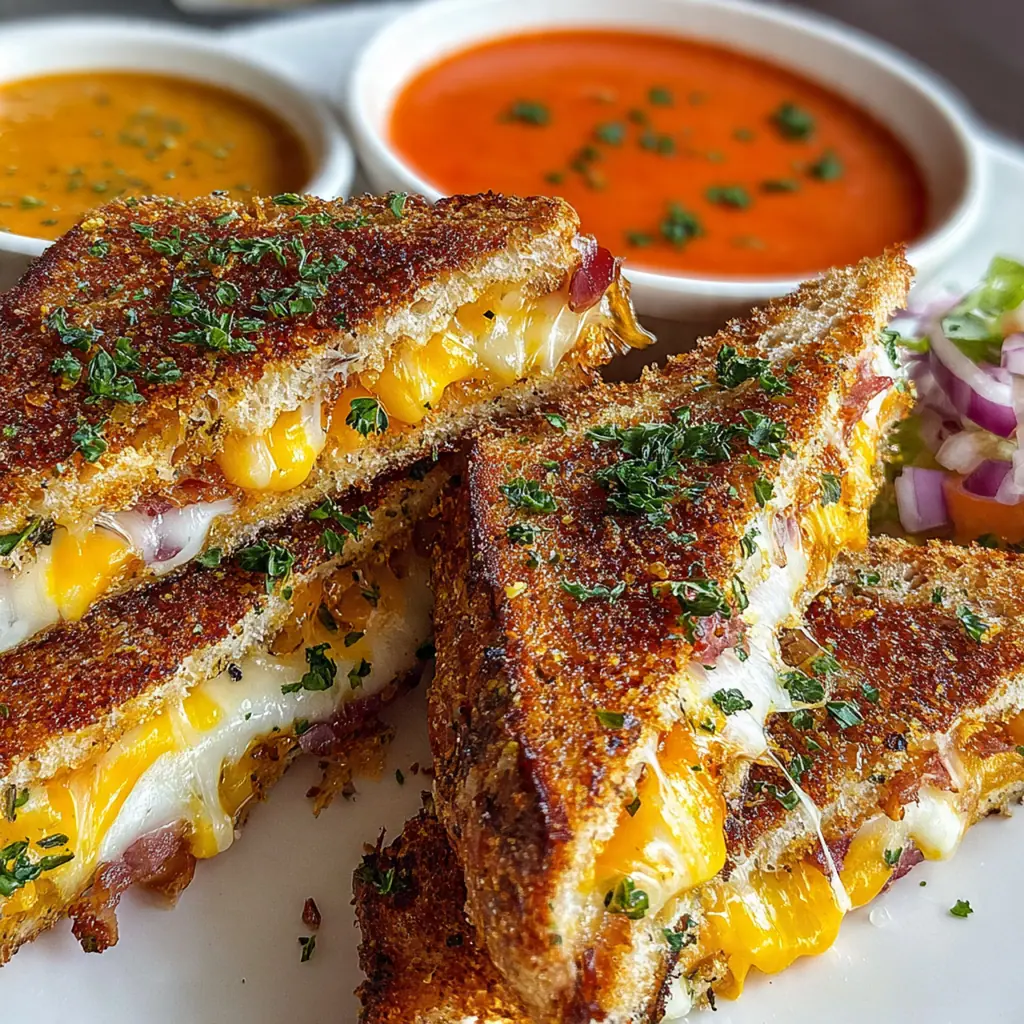
Once they’re golden brown and the cheese inside is fully melted, transfer them to a cutting board. Let them cool for just a minute so the cheese sets a bit, then sprinkle with chopped fresh chives. Serve them right away with warm marinara sauce on the side for dipping.
You Must Know
- A mix of cheeses gives you the best melt and flavor
- Cook your bacon until it’s very crisp to avoid sogginess
- Don’t overstuff the fingers or cheese will leak out
- Keep the heat at medium-low for even toasting without burning
- Let them cool a minute before you cut or bite in
Storage Tips
These Bacon Grilled Cheese Fingers are absolutely best enjoyed fresh and hot from the skillet. If you do have a couple left over, let them cool completely and store them in an airtight container in the fridge for up to two days. To bring them back to life, reheat them in a toaster oven or a dry skillet over medium heat—this will help crisp the bread back up without turning the cheese into a greasy mess. The microwave will make them soggy, so I always avoid it for leftovers.
Ingredient Substitutions
If you don’t have sourdough, any sturdy sandwich bread like Texas toast or a good white bread works just fine. You can swap the cheese blend for whatever melty varieties you have—gruyère, pepper jack, or gouda are all fantastic. For the dip, ranch dressing is a great alternative to marinara, or try a spicy ketchup. To make it gluten-free, use your favorite gluten-free bread, and for a dairy-free version, just opt for plant-based cheese and butter alternatives—they’ll still give you that melty, crispy result.
Serving Suggestions
These are a dream paired with a creamy tomato soup for the ultimate comforting meal. For a party spread, set them out with small bowls of marinara, ranch, and even a honey mustard for different dipping adventures. I love serving them alongside a big, simple green salad or some crisp carrot and celery sticks to balance out the richness. They also make a fantastic game day snack platter right next to some wings and veggie sticks.
Cultural Context
The grilled cheese sandwich is a cornerstone of American comfort food, a simple staple born from economic necessity that’s been endlessly reinvented. Adding bacon is a natural, beloved evolution, turning a humble lunch into a hearty, indulgent treat. Serving it in finger form for dipping speaks to our modern love for shareable, handheld party foods perfect for social gatherings and casual eating. It’s a fun, interactive twist that keeps the spirit of the classic alive while making it perfectly suited for feeding a crowd.
Pro Tips
- Use pre-shredded cheese for convenience or shred your own for better melt
- Press the sandwiches gently while they cook for even toasting
- Add a little extra butter to the pan if things start to stick
- Cut them in half crosswise for even more dippable, bite-sized pieces
- I always make a double batch because they disappear so fast
Frequently Asked Questions
Thick-cut bacon is ideal as it holds its shape and provides a satisfying, crispy texture that contrasts perfectly with the melty cheese. You can cook it to your preferred level of crispiness before adding it to the sandwich fingers.
For the best texture, assemble and grill them just before serving. However, you can cook the bacon and shred the cheeses in advance to cut down on prep time when you’re ready to cook.
Any sturdy, thick-sliced bread like Texas toast, French bread, or a hearty white bread works well. The key is using a bread that can hold the cheese filling without becoming soggy.
They’re ready when the bread is a deep golden brown and crispy on the outside, and the cheese inside is visibly melted. This usually takes about 3-4 minutes per side over medium heat.
They’re fantastic dipped in warm marinara sauce, as suggested, but also pair wonderfully with ranch dressing, a creamy tomato soup, or a spicy sriracha mayo for an extra kick.